
1 Accounts
1.1 Adding accounts
To add an account, either:
- Open the navigation drawer, go to the Accounts section and tap the green "+" to add a new account
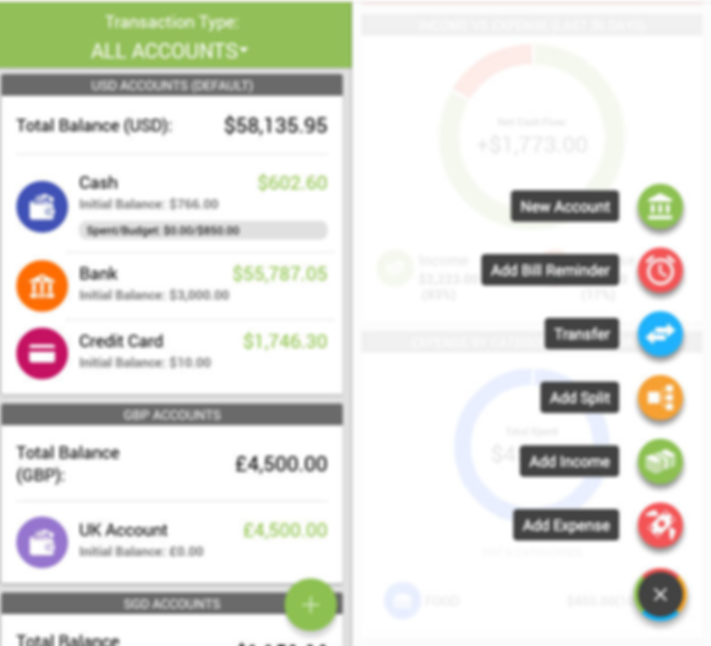
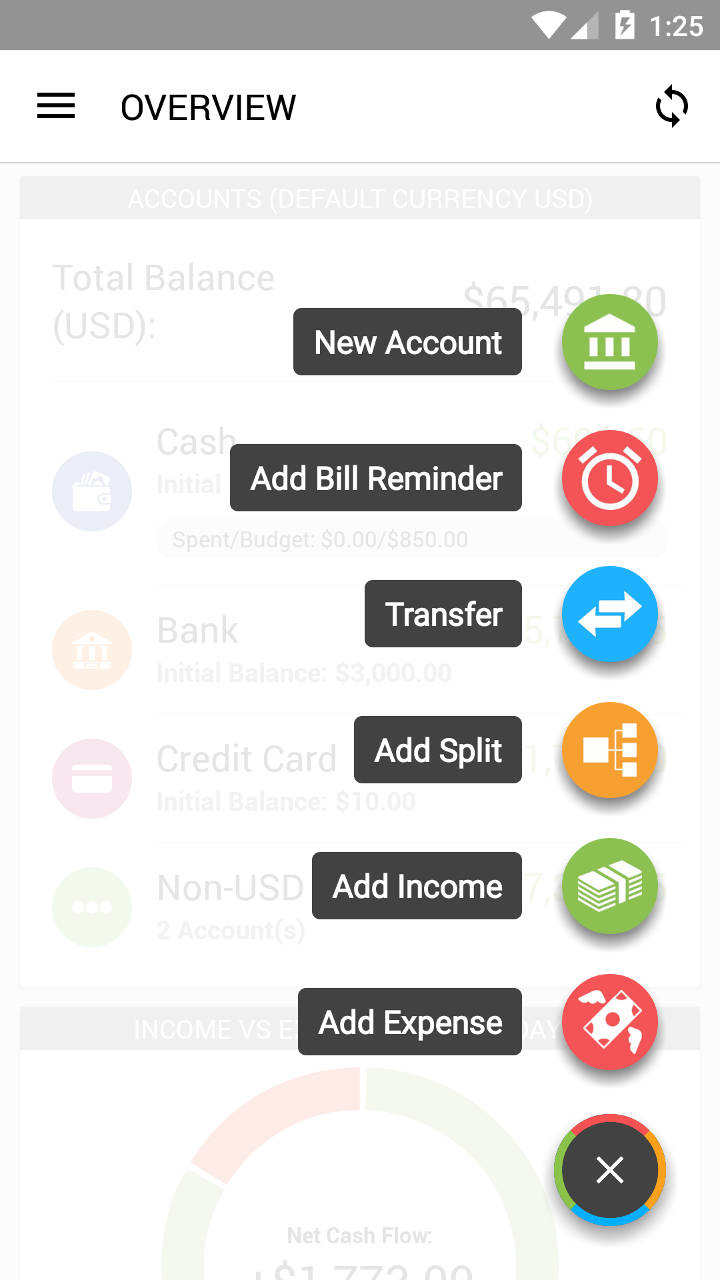
- (May not show on some devices due to display size and resolution) Use the Quick Add Wheel and tap on the green "New Account" option
1.2 Editing/Deleting accounts
To edit an account, simply tap on the account first then tap on 'Edit Account'.
To delete an account, simply tap on the account first then tap on 'Delete Account'.
2 Transactions
2.1 How do I add an expense, income, split or transfer transaction?
Use the Quick Add Wheel! It is easily accessible from the bottom-right. You can easily and quickly add a transaction from the wheel.
Read more: Split Transactions Guide

2.2 How do I exclude future transactions from being calculated in the account balance?
Go to Settings > Display Settings > Account Balance Display and save it as 'Show Today's Balance'.
2.3 I created a repeating transaction but where is its next repeat?
By default, recurring transactions only appear on the transaction date itself. To change this setting, please go to Settings > Display Settings and set 'Create Repeating Transactions X days in advance' where X can be up to 90 days. Exit the app completely using the back button, then relaunch and check the account.
Note that the created transactions will not disappear if you change from a longer days period to a short one.
If Cloud Sync is enabled: note that only the master device will create repeating transactions. To set your current device as the master device, please go to Cloud Sync > "Current Device is:"
You can also go to the "Repeating Items" section to see when your next transaction will be created for each Repeating Item.
Read More: Managing Repeating Items
2.4 How do I stop a repeating transaction or reminder I no longer want?
To halt and delete a repeating transaction or reminder, please follow the below steps.
1. Go to the "Repeating Items" section.
2. Find the Repeating Item you want to stop, tap on it and tap on "Delete" to stop the repeating item. Your already created transactions will not be affected.
Alternatively,
1. Tap to edit the latest repeating that you no longer need
2. Change from 'Repeat' to 'Does Not Repeat'
3. Save and update the change and make sure it longer has the blue repeat icon
4. Delete the updated transaction or reminder
Note that latest means the latest created one. For transactions, try changing the date period to 'Post Dated Transactions' to see if there are others previously created from the same repeating transaction. If yes, repeat the same actions above for them.
Read More: Managing Repeating Items
2.5 I edited a repeating transaction but repeats do not appear.
Expense IQ's cloud sync function determines whether repeating items will be populated based on the device's status.
Check if:
1. you have cloud sync enabled?
2. your current device is set as Master?
Note that if cloud sync is enabled and the current device is not the master device, no repeating items will be created. This is to prevent duplicates to be created and synced by all master and non-master devices. Setting your current device as Master will populate the repeating items.
2.6 Searching and filtering transactions
Simply tap on the magnifying glass icon on the top of every transaction list. You can also set filters like transaction status, category etc.

2.7 Selecting multiple transactions
Simply tap and hold on one transactions till you see it highlighted in blue, then proceed to tap on other desired transactions. Tap on the right icon on the top blue bar to perform an action on the selected transactions.
2.8 Transaction statuses and what they mean
It is not compulsory to use all the different statuses. Usage will depends on how detailed you wish to record your transactions. An example will be provided for each transaction status below.
- Uncleared - This is the default transaction status. You have just written a $200 cheque to someone. A transaction will be created as Uncleared.
- Cleared - You went for an ATM withdrawal and notice that your account has $200 less. This probably means that your cheque has been cashed in. You update the transaction to Cleared.
- Reconciled - You received your monthly bank statement and want to check if the transactions are in order. You launch the app and do an Advanced Search for Cleared transactions. If the transaction is reflected in your statement, you can update the transaction to Reconciled.
- Void - If a transaction has been declined but you wish to keep a record for reference, mark the transaction as Void. The transaction will be recorded with a strikethrough.
2.9 Adding photos/images to transactions
To add photos from your camera or gallery to transactions, simply tap on the camera icon (beside the payee/item field) and select the image you want to attach or take a photo to save it together with the transaction. You can find the saved photo in the ExpenseIQ folder in your storage.
For Bill Reminders, you can also add a photo/image after marking a bill as paid and editing the transaction.
3 Categories and Payees
3.1 What happens when I delete a category or payee that has transactions?
The transaction entries will be moved to the 'Others' category.
3.2 How do I add/edit/delete sub-categories?
Read more: Using Sub-categories